How to Set Up Xaman (Mobile Wallet) to Hold and Use XRP on XRPL

Mobile Wallet: Xaman for XRPL
Getting started on XRPL is easy - all you need is a self-custodial wallet and a bit of XRP. If you’re on mobile, Xaman is a smooth, intuitive option built just for XRPL. You’ll be ready to explore onchain apps in minutes!
Prefer a desktop experience? See our Crossmark guide →
About Xaman
Xaman is a self-custodial mobile wallet built specifically for the XRPL. It gives you full control over your XRP, lets you connect to onchain apps, and makes sending, receiving, and managing assets easy - right from your phone.
As a hot wallet, Xaman is always online for convenience, but that also means you’re responsible for keeping it secure. Your private keys are stored locally on your device, not on a server, so only you have access, and only you can recover it if something goes wrong.
Tips to Stay Safe
- Write down your recovery phrase and store it offline - never in your phone, browser, or cloud.
- Avoid screenshots of your seed phrase - many mobile devices back them up automatically to the cloud.
- If you lose your recovery phrase, you lose access to your funds. There is no reset or recovery service.
- Never share your phrase. No support team or legit project will ever ask for it.
- Avoid unknown links and transactions. Double check what you're signing, and only use trusted apps.
How to Set Up Your Xaman Wallet
Step 1: Download the Xaman App
Vist xaman.app and follow the links to download Xaman from the App Store or Google Play. This mobile wallet is purpose-built for the XRP Ledger and makes it easy to create and manage XRPL wallets.

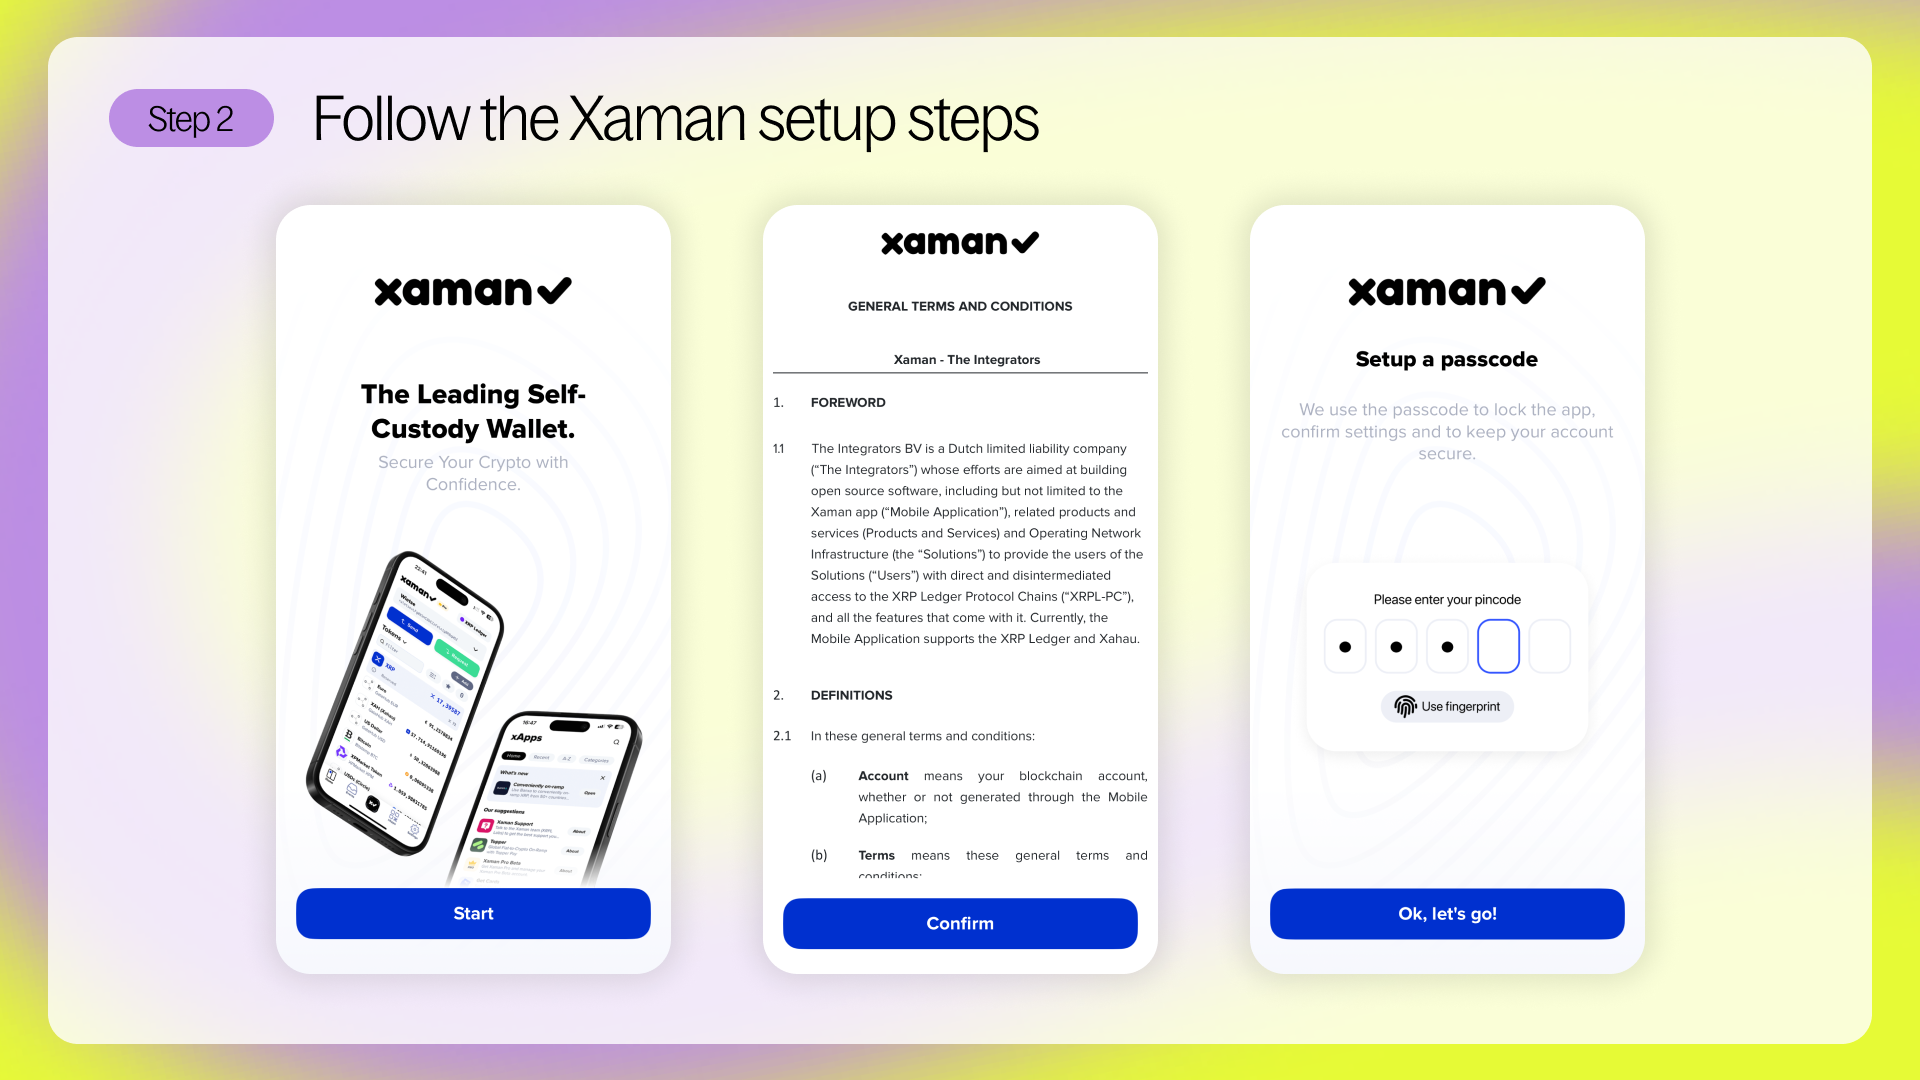
Step 2: Follow the in-app setup steps
Tap Start and follow the prompts to:
- Set a device passcode - this protects your wallet locally and helps secure your session.
- Accept terms
- Enable push notifications
Press Start and follow the onboarding steps to set up a passcode, enable push notifications, and accept the terms and conditions.
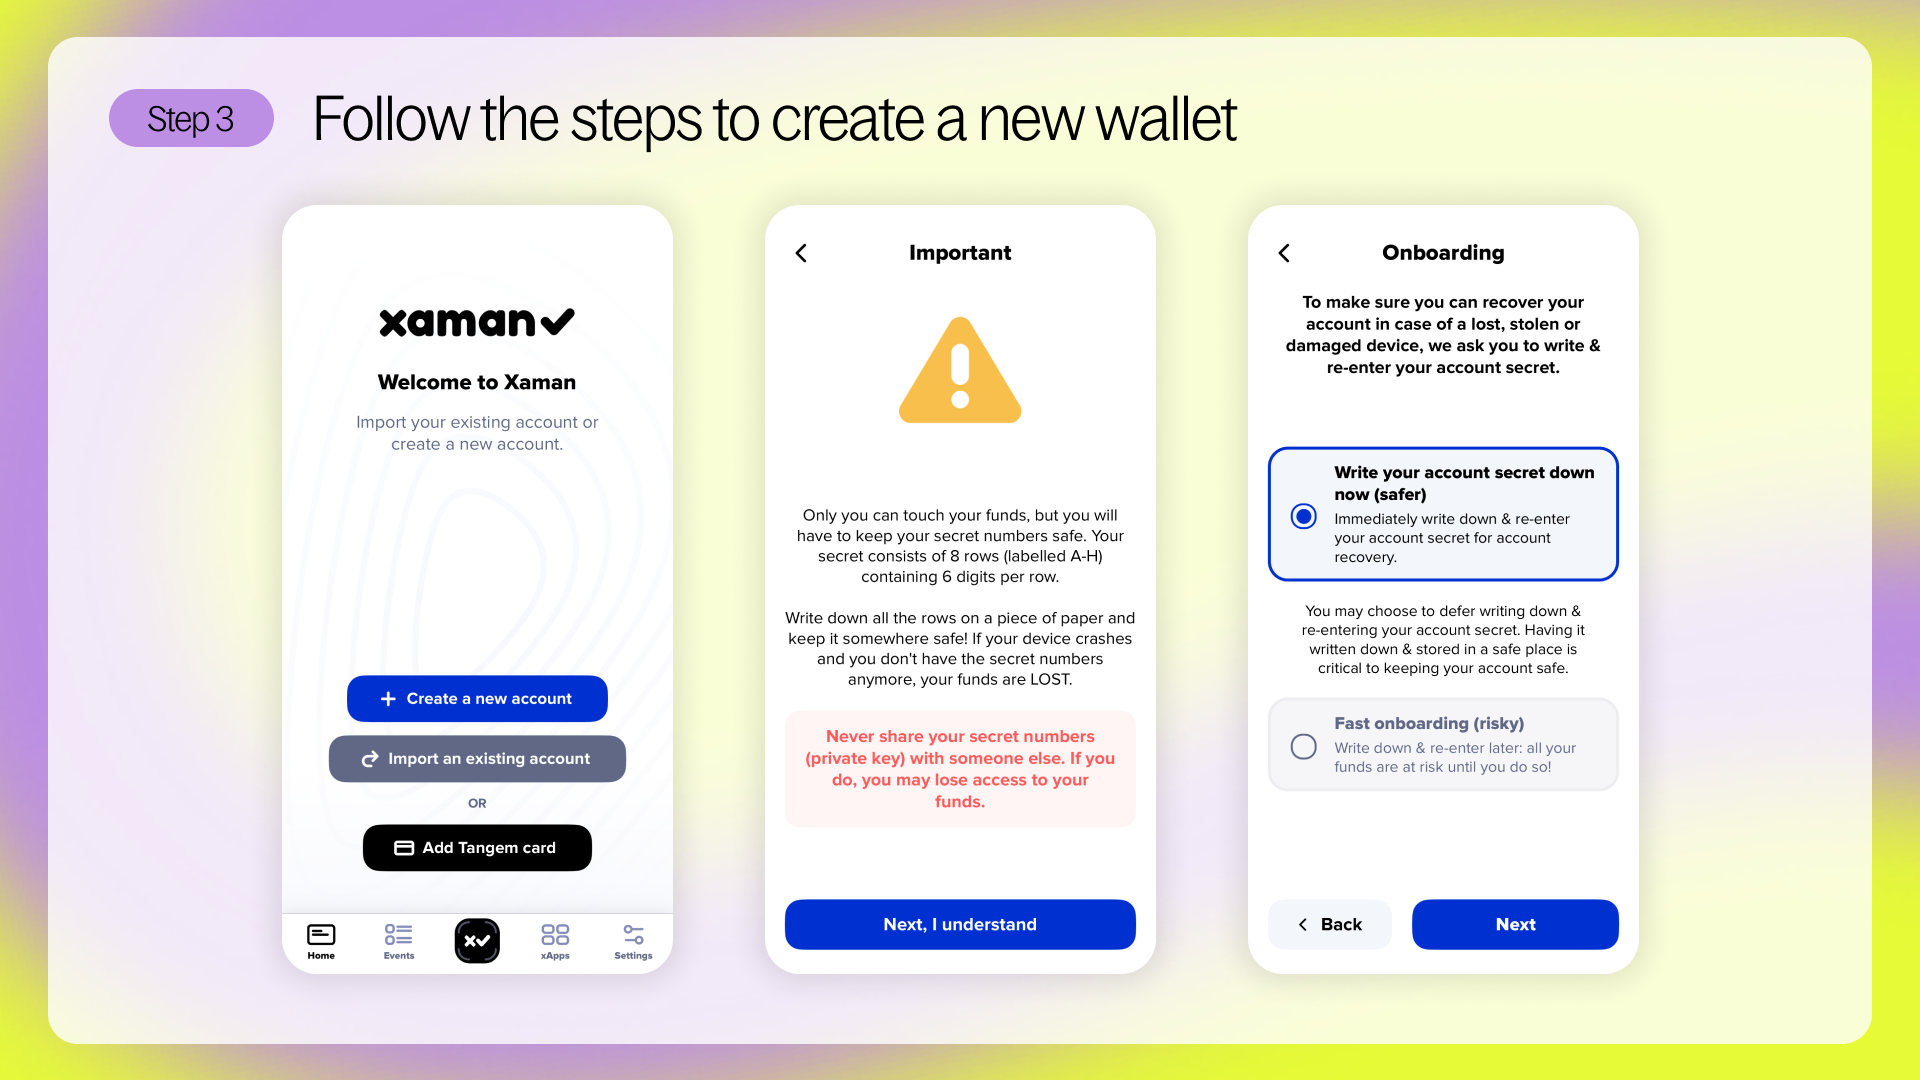
Step 3: Create a new wallet
From the home screen, tap Create a new account to generate your wallet. This will be your self-custodied account on the XRPL - Xaman doesn’t hold your keys or funds.
We recommend you select the option to write your account secret numbers down first.
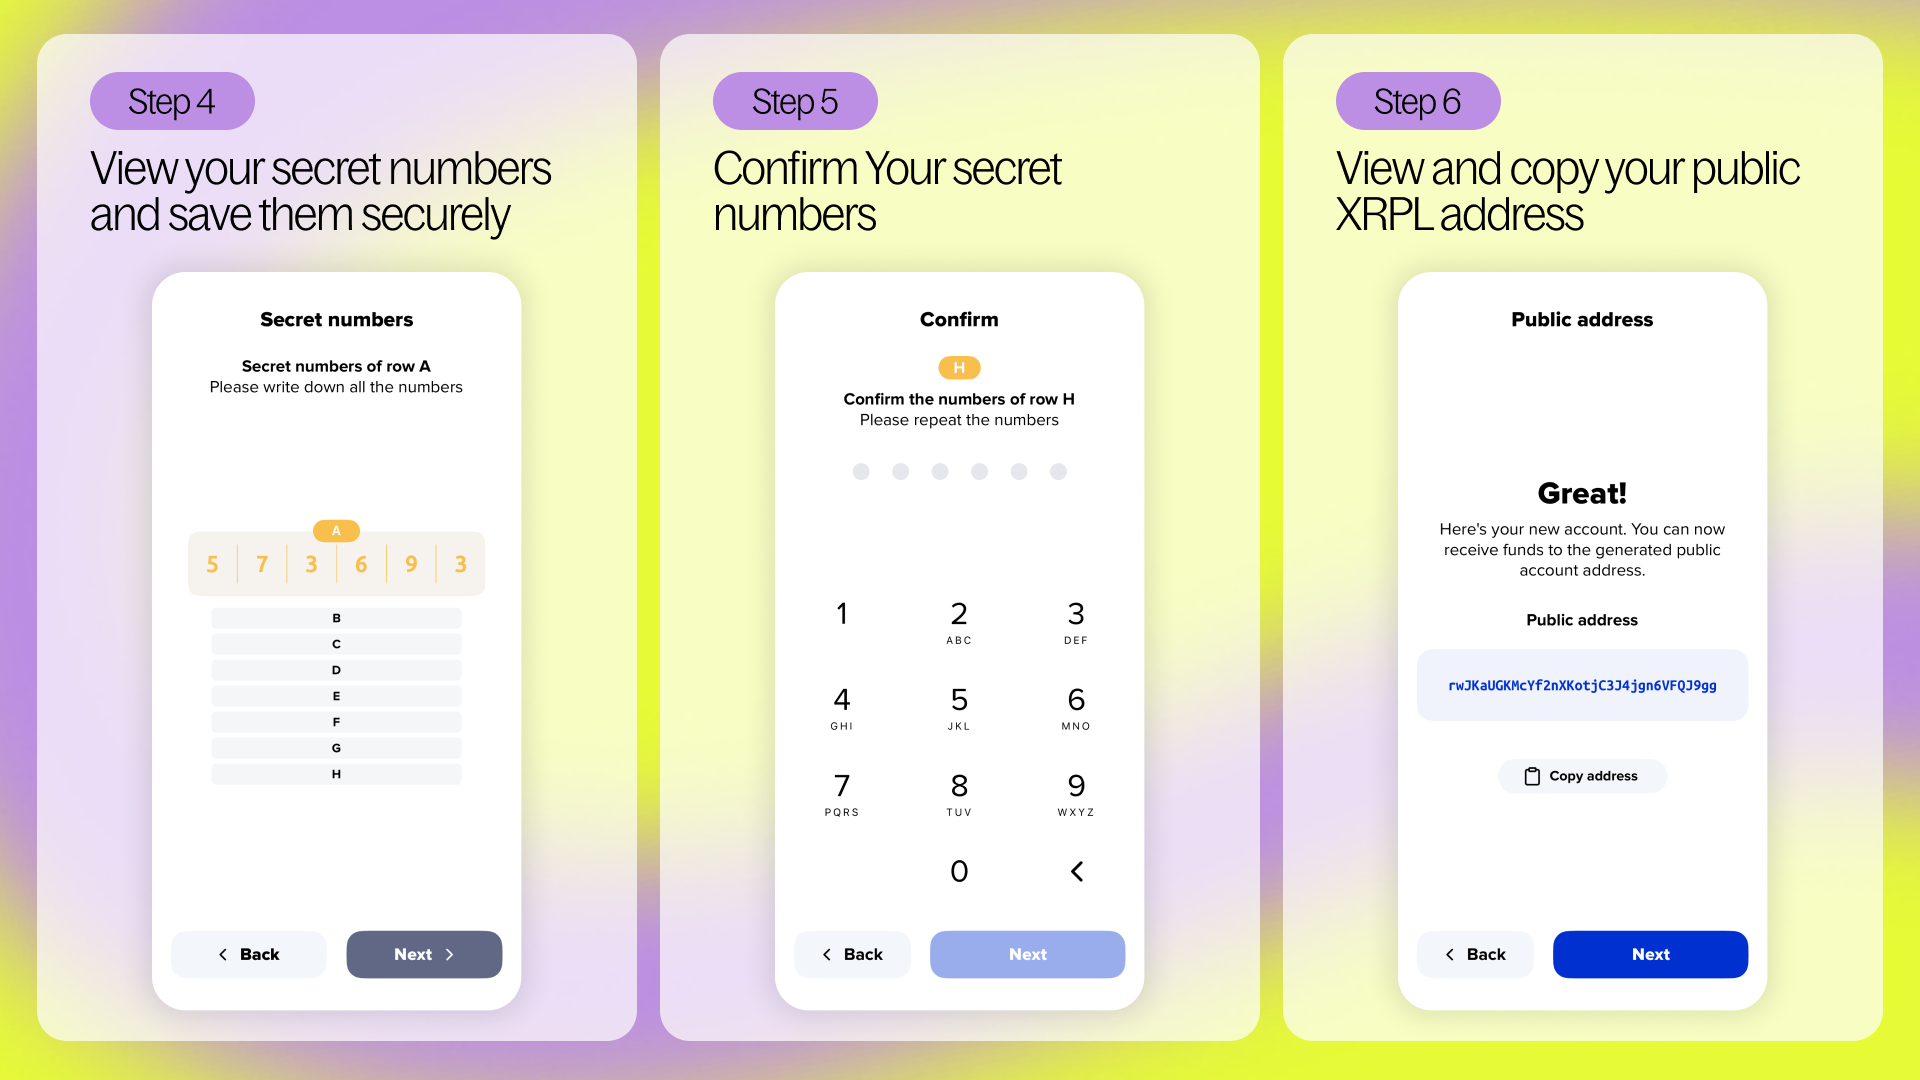
Step 4: View your secret numbers
You’ll be presented with your wallet’s recovery phrase. Xaman uses a system called secret numbers to secure wallets - this consists of 8 rows of 6 digits each. These numbers are your private key, and they’re the only way to recover your wallet if you lose access. Write this phrase down and store it offline **in a secure place. Never save it on your phone, browser, or cloud storage. Anyone with this phrase can access your wallet.
Step 5: Confirm your secret numbers
You’ll be asked to re-enter your secret numbers to confirm you’ve written them down correctly. This step ensures your backup is accurate before you move forward.
Step 6: View your public address
Once the wallet is created, your public XRPL address will be shown. This is like your wallet’s account number - it’s safe to share with others so they can send you XRP or tokens, but it can’t be used to access your wallet.
Note it down - we’ll use it in the next step. You can also access it later from the main wallet view.
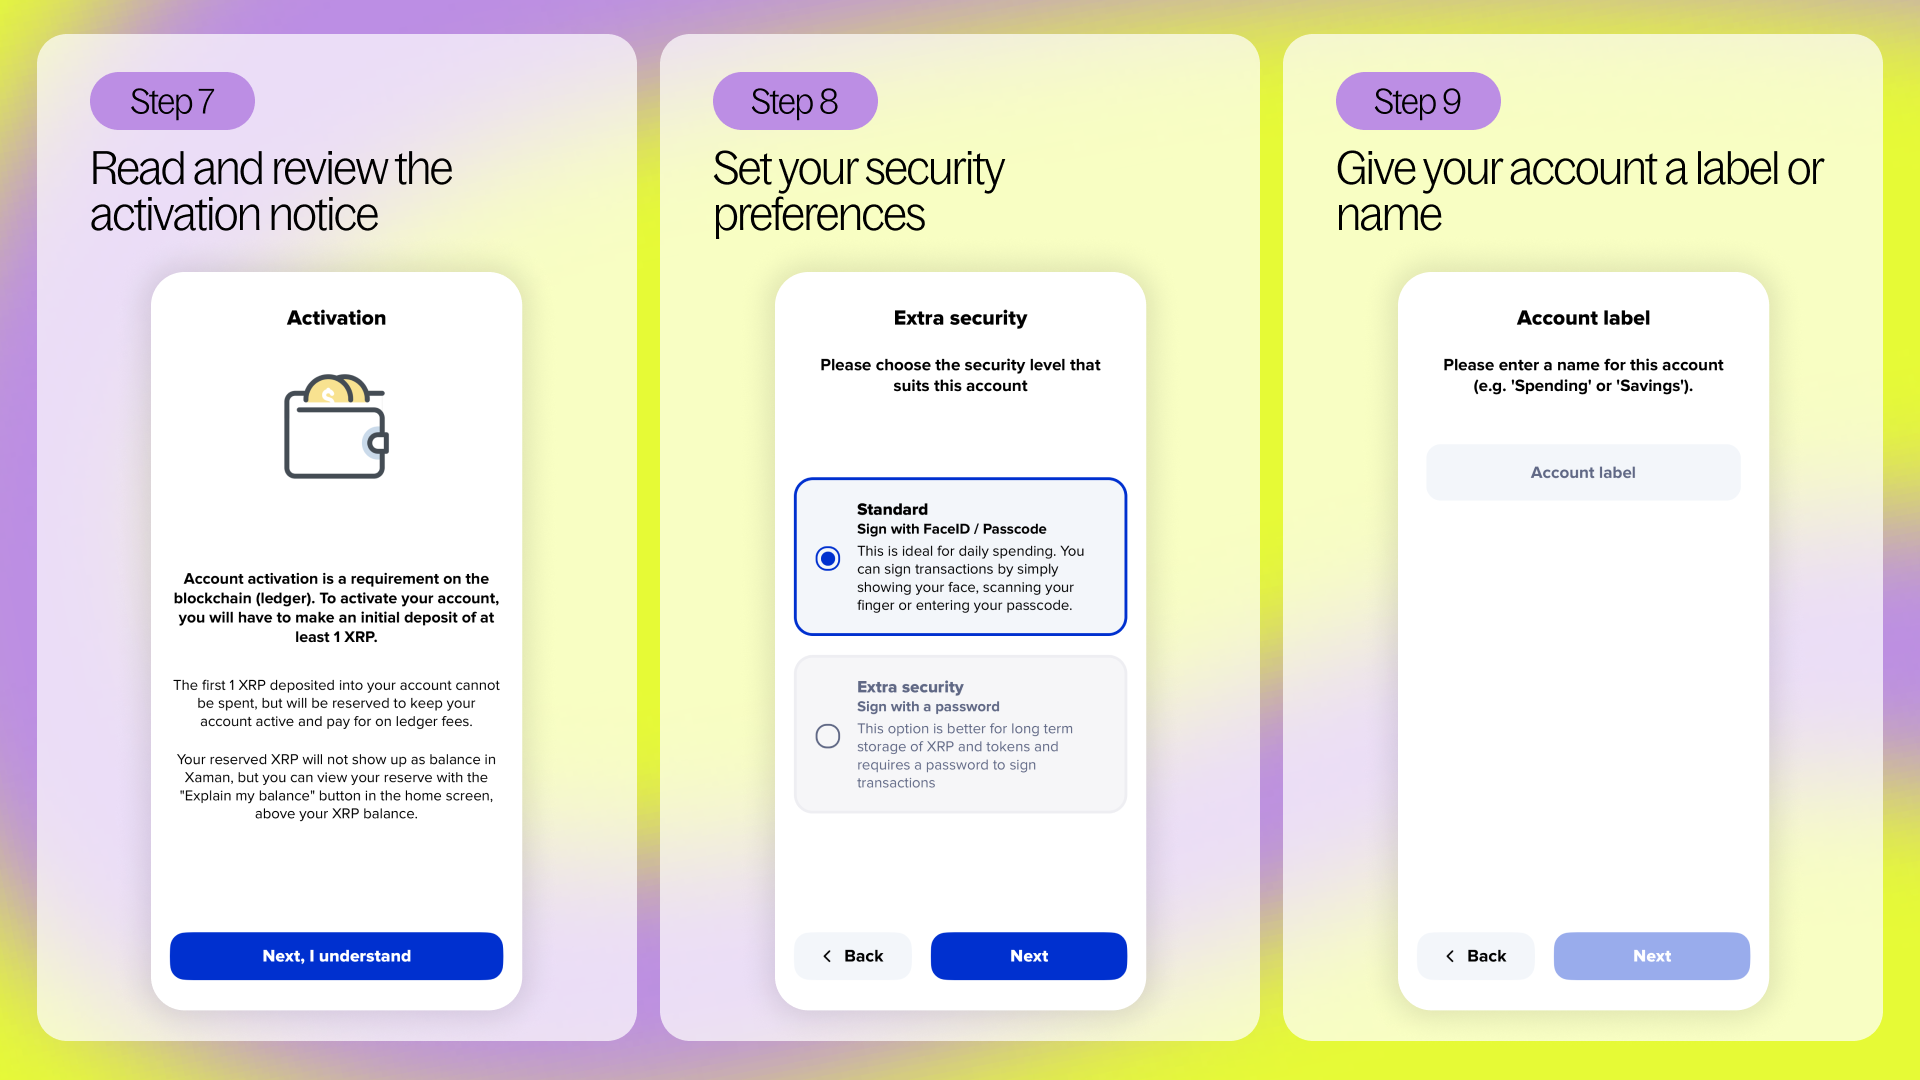
Step 7: Read and review the activation notice
Before completing setup, you’ll see an activation notice. Xaman explains that account activation is a requirement on the XRPL - you’ll need to send at least 1 XRP to your wallet to make it usable. This 1 XRP acts as a permanent reserve and cannot be spent.
You’ll need to tap “Next, I understand” to proceed.
To activate your XRPL account, you need to send least 1 XRP to your wallet address. This is a requirement on the XRPL to reserve your spot on the network. It’s not a fee, but a minimum balance that must remain in your wallet to keep it active.
Step 8: Set your security preferences
Choose how you’d like to secure this account:
- Standard – use FaceID, fingerprint, or passcode (best for daily use)
- Extra Security – use a password to confirm transactions (good for long-term holding)
Step 9: Label your account
Give your wallet a name to help keep things organized.
Step 10: Wallet created - Ready to activate!
You’ll now land in your main wallet view - your account is set up, but still needs to be activated. You’ll need to activate it by sending at least 1 XRP to your address. This is an XRPL requirement - not a fee, just a reserve to keep your wallet live on the network. We recommend sending 11 XRP so you have 10 XRP ready to use right away.
Tap “Activate your account” to view activation options inside the Xaman app. Or, you can follow one of the guides below.
You can activate your wallet by:
- Buying XRP with card →
- Withdrawing XRP from an exchange →
- Transferring from another XRPL wallet →
- Bridging to XRP via Squid →
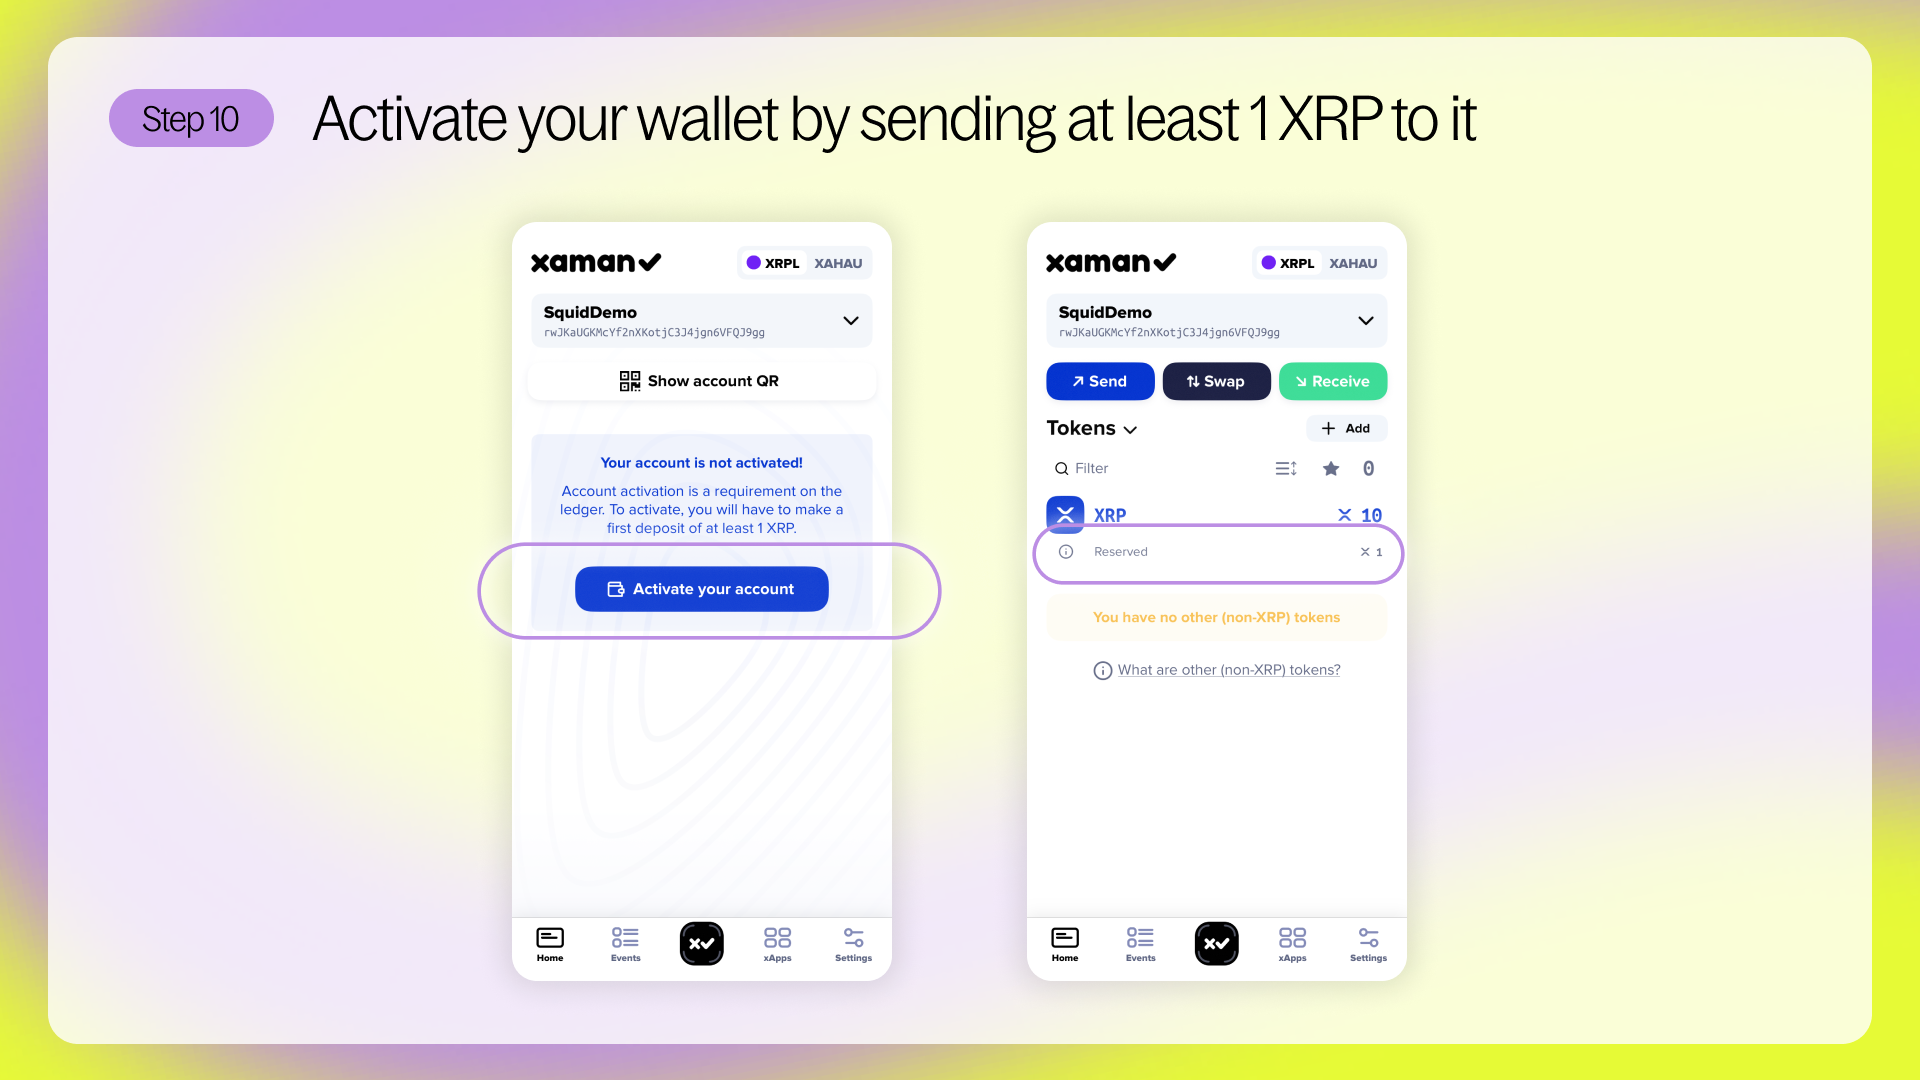
Once the XRP is received, your account will automatically activate. You’ll see your XRP balance reflected in the app, along with a label showing that 1 XRP is reserved (the onchain requirement to keep your account active).
You're now ready to start exploring the XRPL ecosystem!