How to Bridge from the XRPL EVM Sidechain to XRP Ledger

Need to move your XRP from the XRPL EVM sidechain back to the native XRP Ledger? Squid makes it fast, simple, and secure.
Whether you're cashing out, consolidating assets, or just wrapping up some onchain activity, this guide will walk you through how to bridge XRP from XRPL EVM to XRPL using Squid.
What you’ll need to bridge back to XRPL
Before you begin, make sure you have:
- An EVM-compatible wallet (like MetaMask) 👉 Set up your XRPL EVM wallet
- Some XRP on XRPL EVM in your connected wallet
- An XRPL wallet (like Xaman or Crossmark) to receive the bridged XRP 👉 Create your XRPL wallet
How to bridge from XRPL EVM to XRPL
In this example, we’ll move XRP from the XRPL EVM sidechain back to the XRP Ledger using Squid.
Step 1 – Connect your XRPL EVM wallet
Go to app.squidrouter.com and click Connect Wallet next to the Pay field. Choose MetaMask (or your EVM wallet of choice) and approve the connection.
Once connected, your XRPL EVM wallet address will appear.

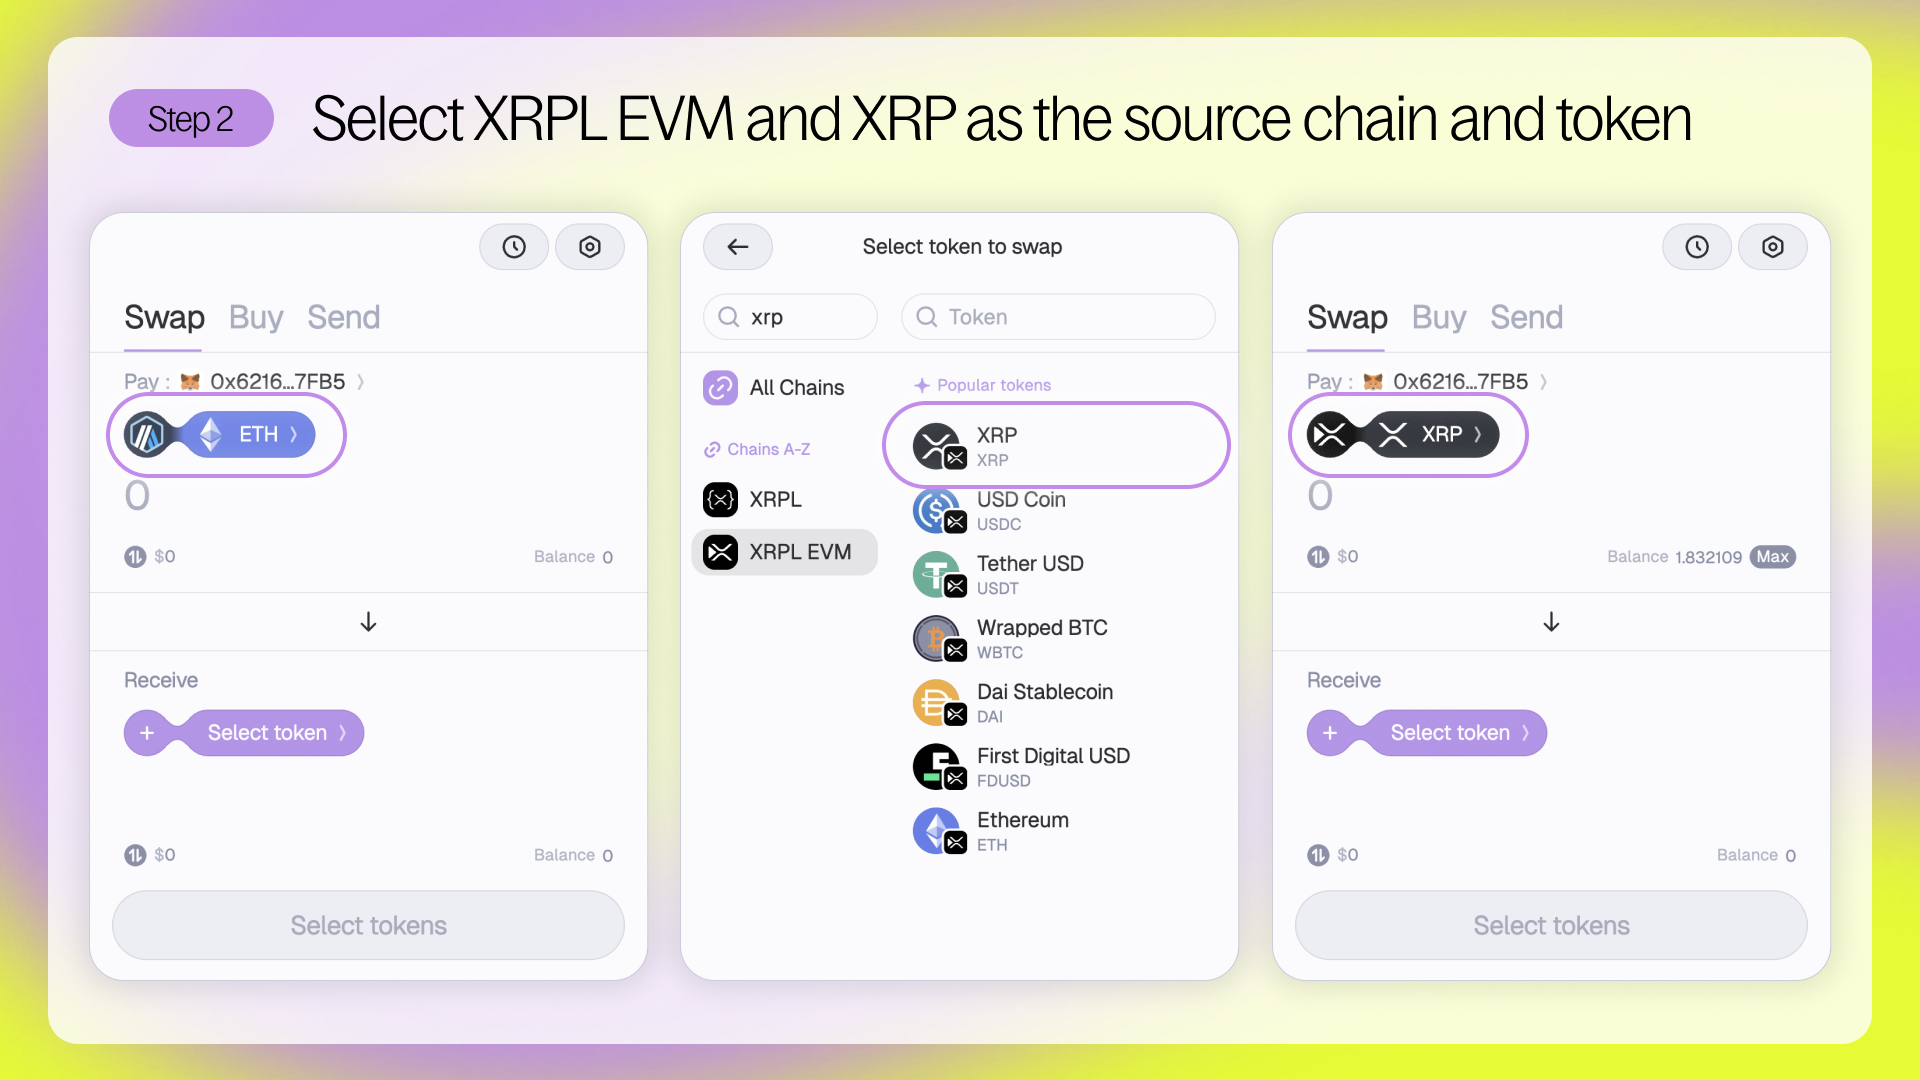
Step 2 – Select XRPL EVM and XRP as the source chain and token
Click the chain and token dropdown under Pay. Choose XRPL EVM as your source chain and XRP as the token you want to send.
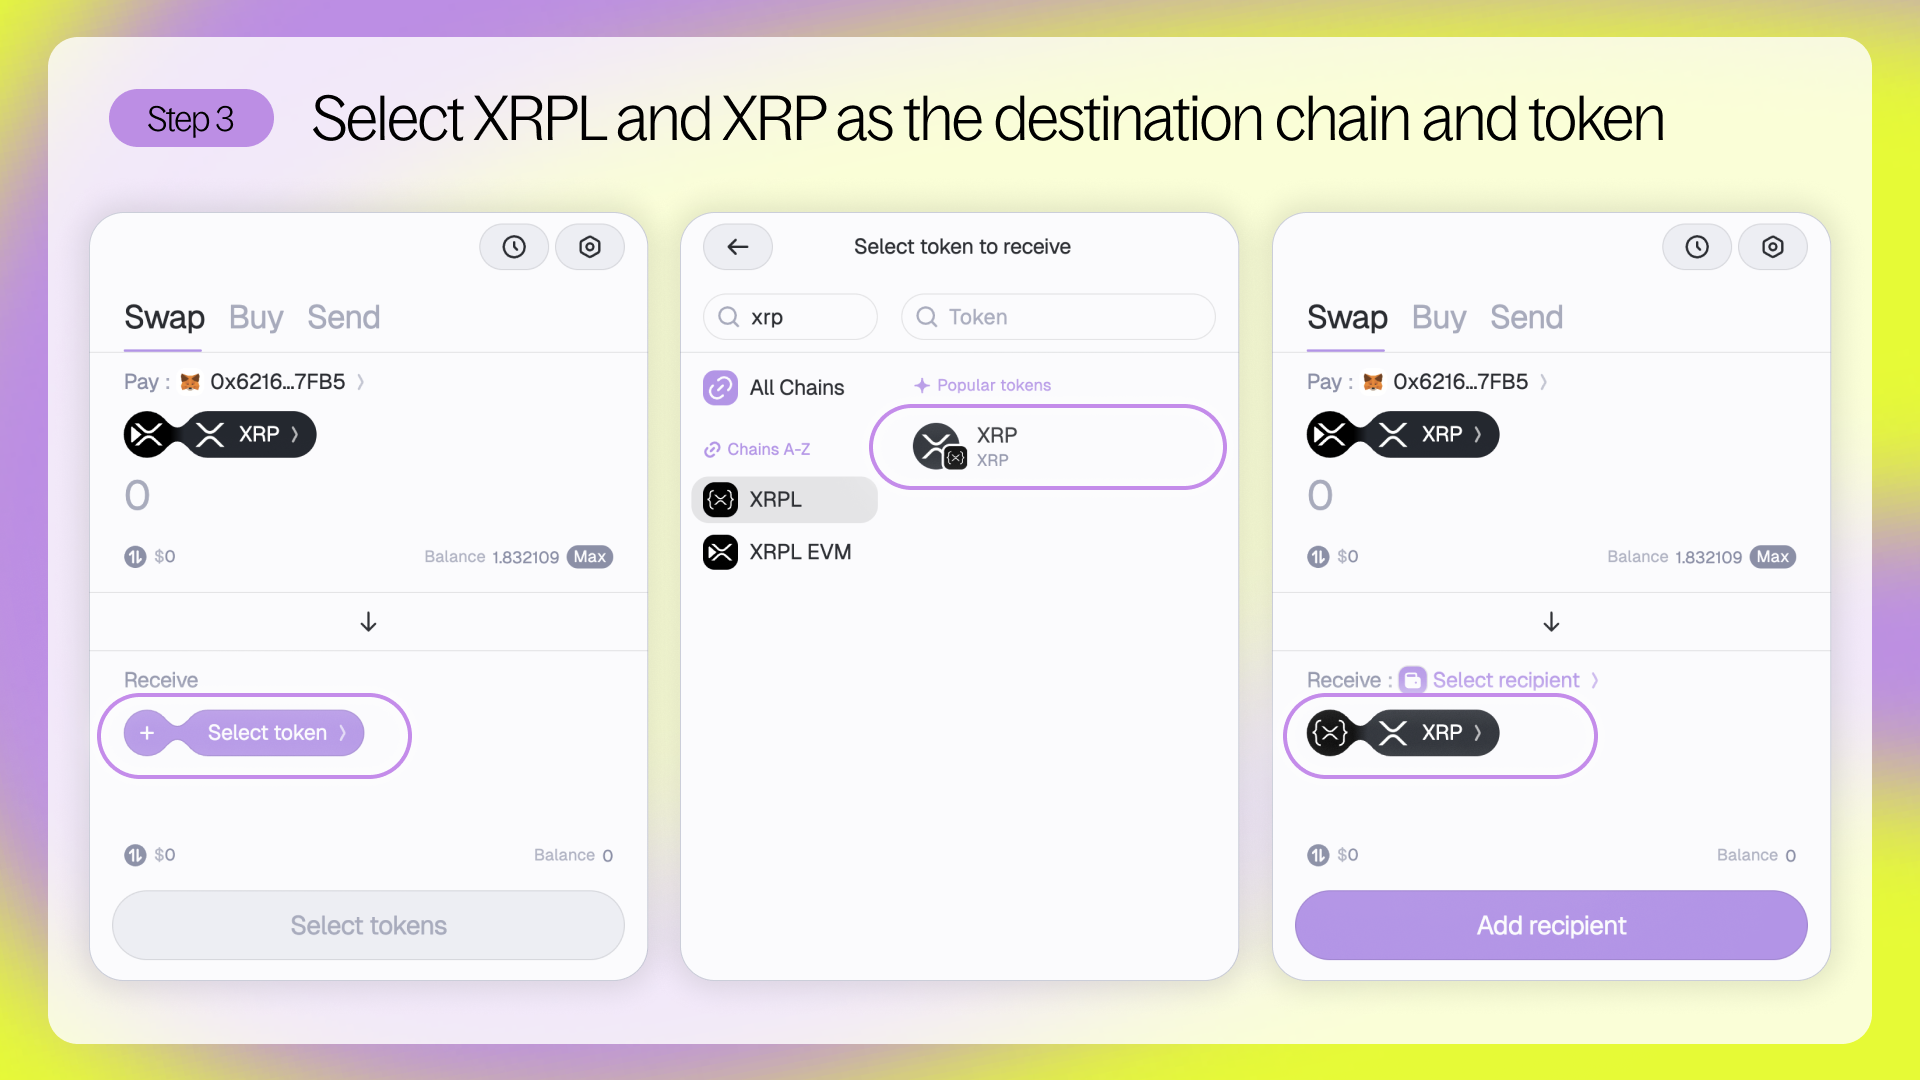
Step 3 – Select XRPL and XRP as the destination chain and token
Under Receive, click the chain and token dropdown. Select XRPL as the destination chain and XRP as the token.
This will bridge your XRP directly back to the XRP Ledger.
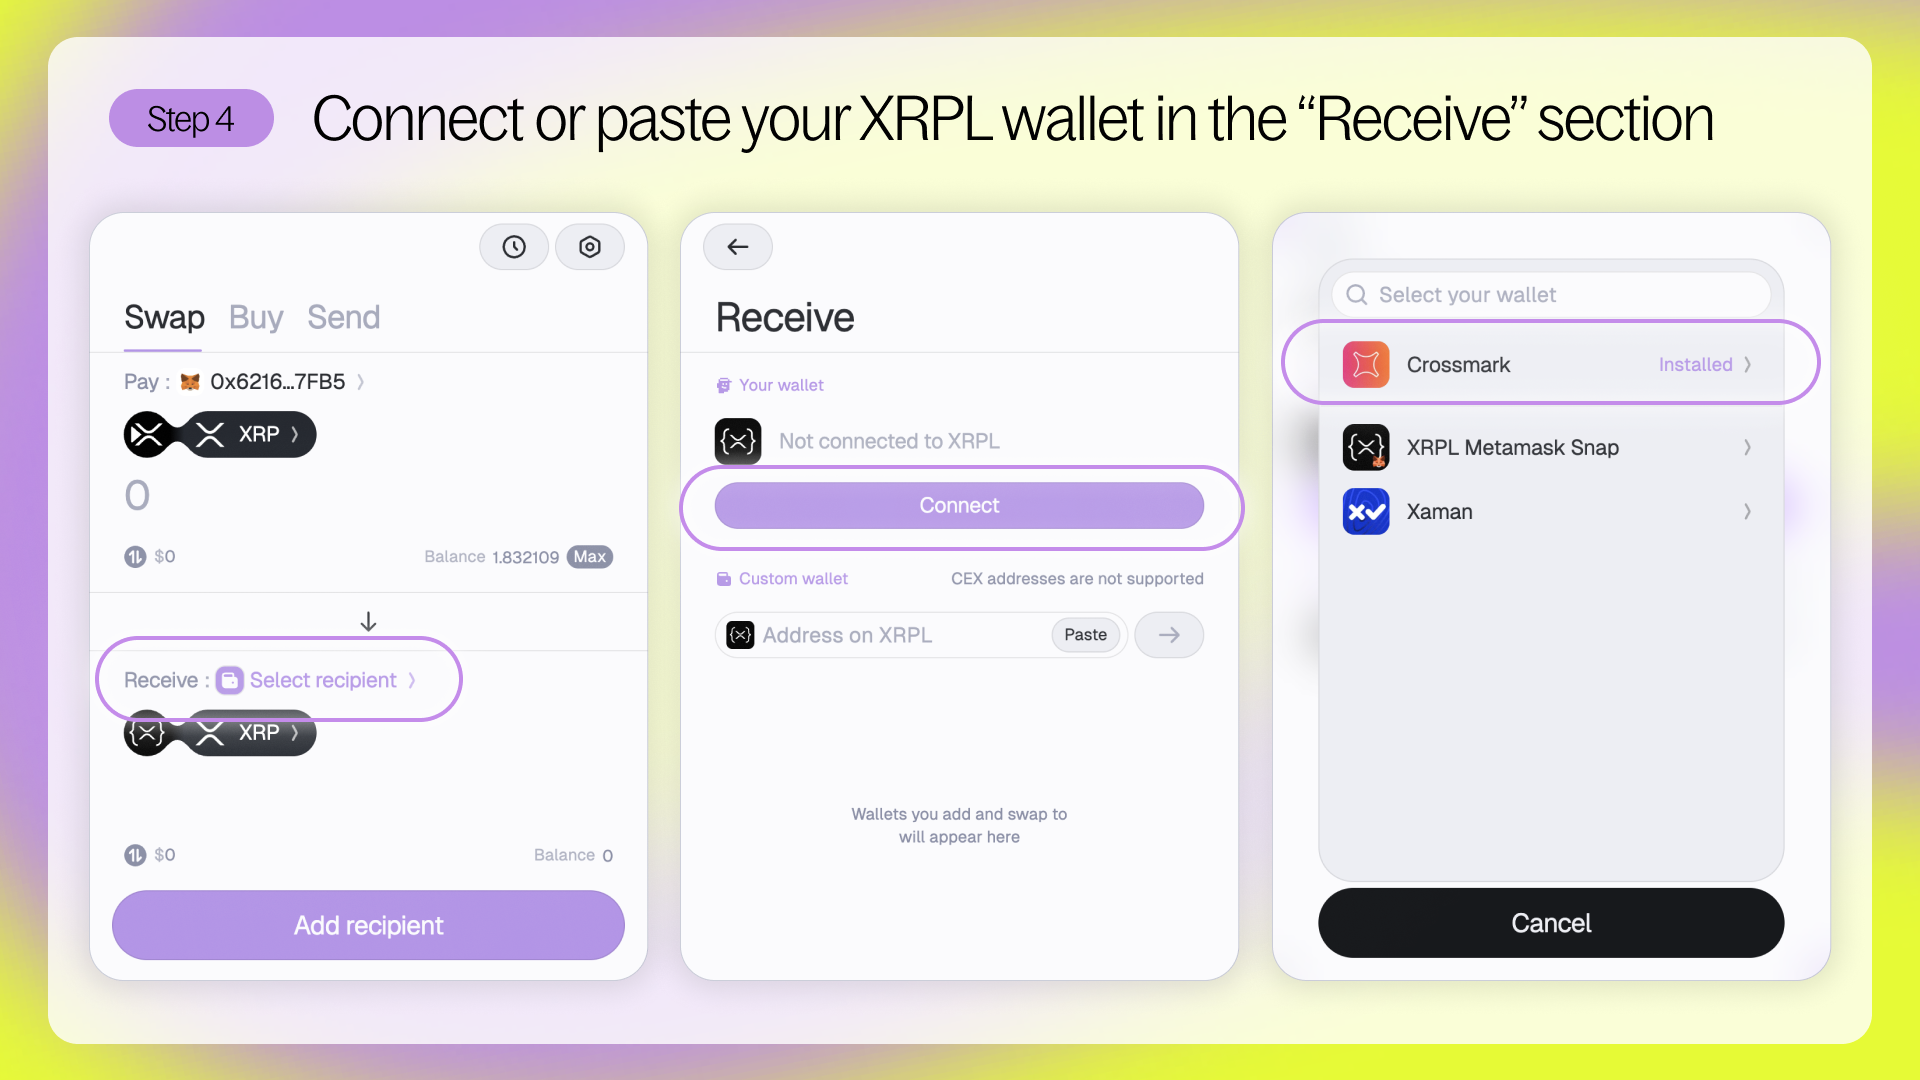
Step 4 – Add your XRPL wallet as the recipient
Click Select Recipient and either connect your XRPL wallet (e.g. Xaman or Crossmark) or paste your XRPL wallet address manually.
Once connected, your recipient wallet will be displayed under Receive.
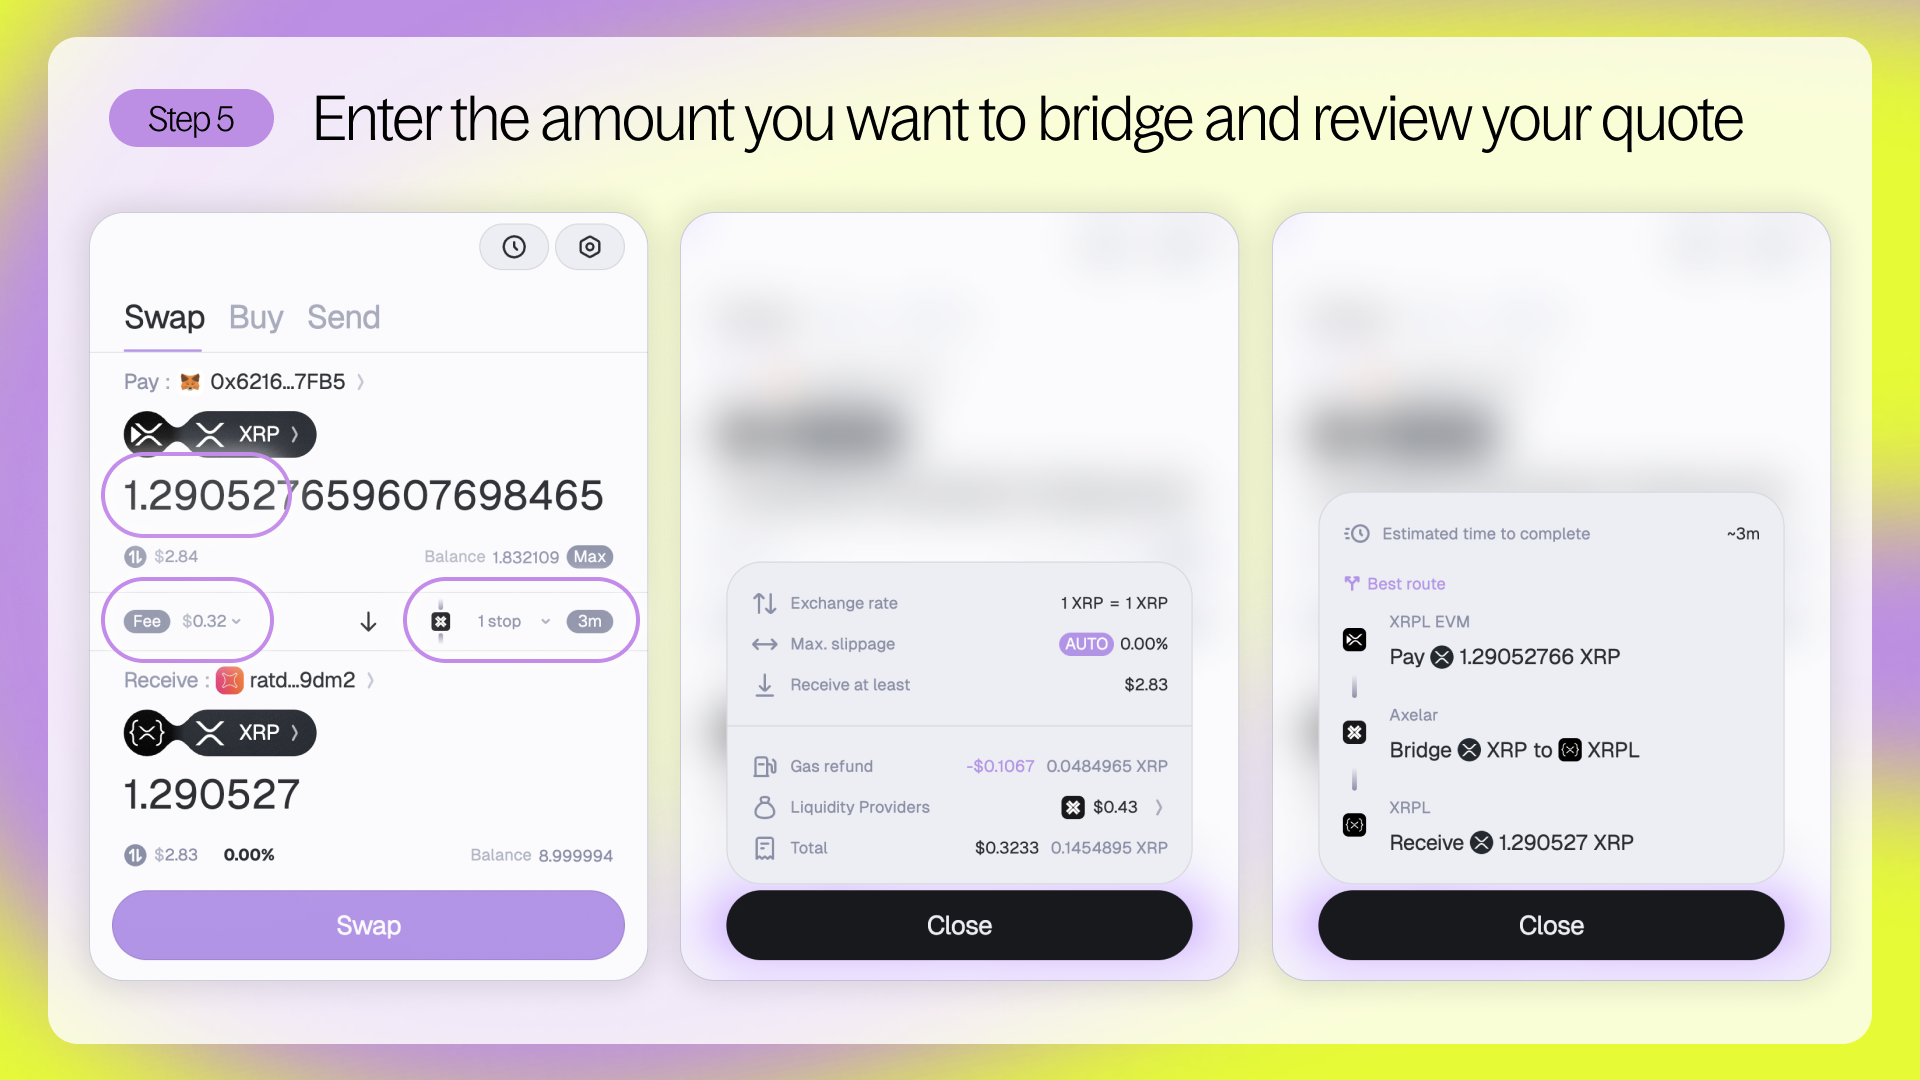
Step 5 – Enter the amount and review your quote
Type in the amount of XRP you’d like to bridge. Squid will show you:
- The estimated amount you’ll receive
- Route details (XRPL EVM → Axelar → XRPL)
- Network and bridge fees
If it’s your first time, you may need to approve token permissions in your wallet.
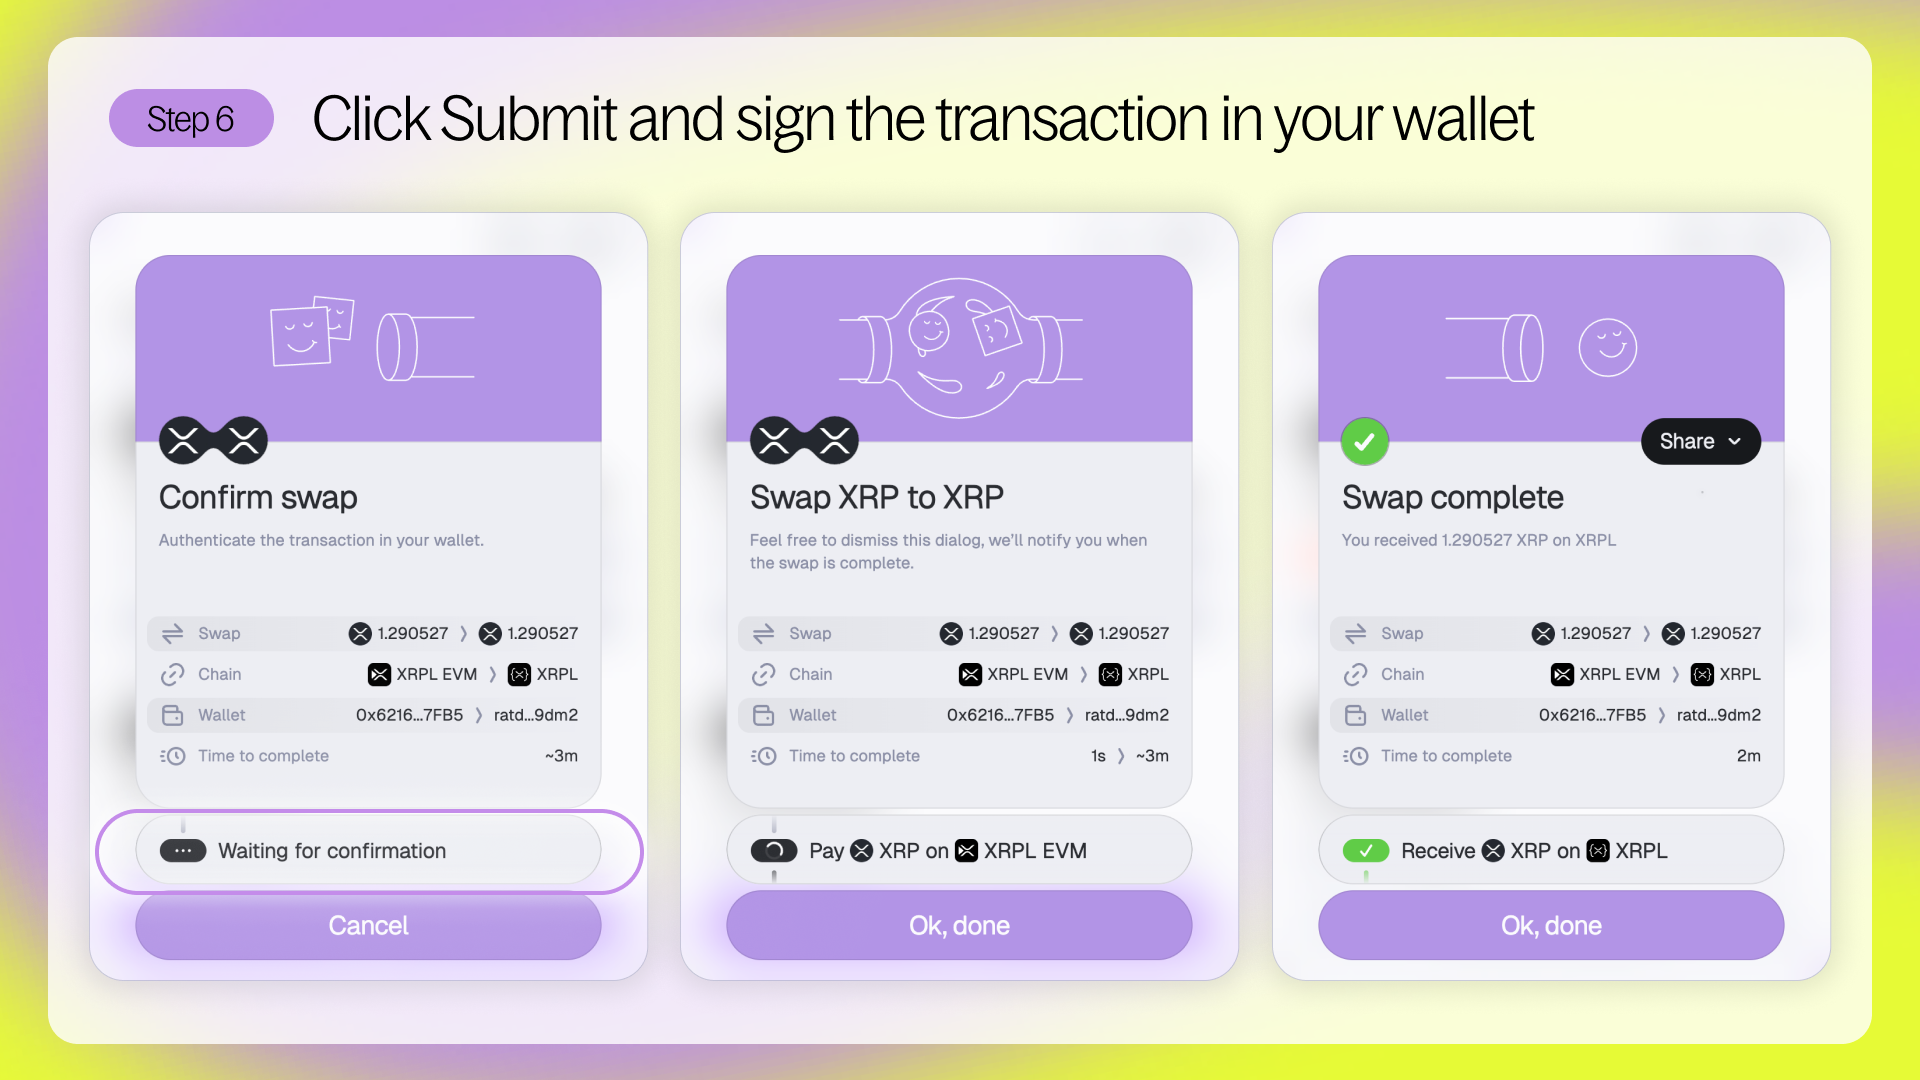
Step 6 – Confirm the swap and approve in your wallet
Click Swap, then follow the wallet prompt to confirm the transaction. Once confirmed, your XRP will be bridged and returned to your XRPL wallet within minutes.
That’s it - you’ve successfully bridged your XRP back to the XRP Ledger!
Congratulations! Your funds are now back on the native XRP Ledger.